REVIEW · AMSTERDAM
See Shoot Share | Photo Tour
Book on Viator →Operated by PDY Media · Bookable on Viator
Canals and phone tips in two hours. This private See Shoot Share Photo Tour is a smart way to see Amsterdam with a purpose: you practice photography with a pro guide on your phone, and you finish with an included portrait in a spot you pick. You get guided lessons that focus on real-world stuff like light, composition, and symmetry, not just random snapping.
The main catch is simple: no food or drinks are included, so you’ll want to plan for water and a snack on your own. Wear comfortable shoes too, because you’ll be walking the whole loop from Dam 13.
In This Review
- Key things to know before you go
- Starting at Dam 13: a private photo walk with real direction
- 9 Little Streets (Negen Straatjes): street photos where every corner gives you choices
- Canal Ring photography: light, symmetry, and lines that actually translate to your phone
- The Jordaan: capturing the quieter Amsterdam mood locals tend to notice
- Your included professional portrait: pick the spot and choose your portrait package
- How much it costs ($66.09) and why it can be good value
- Getting the most out of your time: quick preparation that pays off
- Should you book this Amsterdam photo tour?
- FAQ
- FAQ
- Where does the tour start?
- How long is the tour?
- Is this a private tour?
- What areas do we visit during the tour?
- Is admission included for the stops?
- What’s included in the price besides the walking?
- Does the tour include food or drinks?
- What language is the tour offered in?
- What’s the cancellation rule?
Key things to know before you go
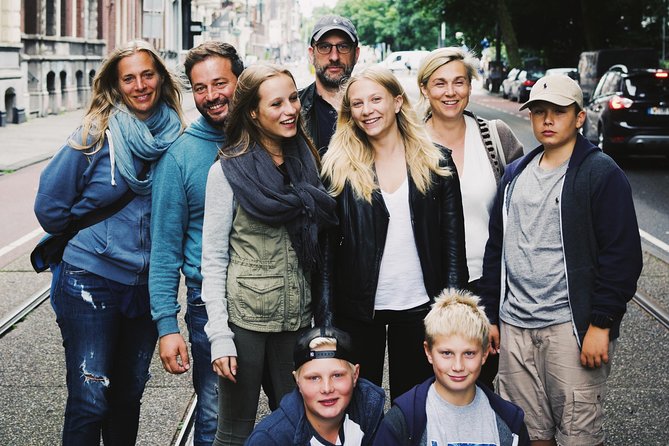
- You get a private experience, with your group only, and your guide can adapt where you photograph
- 9 Little Streets (Negen Straatjes) is built for quick street shots and detail-hunting
- The Canal Ring stop teaches phone photography basics like light, composition, symmetry, and lines
- The Jordaan stop targets the calmer, local side of Amsterdam
- Your portrait is included: Quick Shot (1), Take Two (3 portraits), or Slo Mo (5 portraits)
- Admission tickets are free for the three walking stops on this route
Starting at Dam 13: a private photo walk with real direction

You meet at Dam 13, right in the heart of Amsterdam, and the tour ends back at the same point. The duration runs about 1.5 to 2 hours, which is perfect if you want “learn and shoot” time without turning your whole day into a photo assignment.
This is a private tour, so you’re not trying to take pictures around a crowd while someone is constantly herding strangers. You’re working with a guide who can respond to what you’re seeing and how you’re shooting. That matters, because Amsterdam rewards you for small choices: the angle of a bridge, the reflection in canal water, the way a narrow street forces you into a tighter frame.
It’s also offered in English, and you’ll get a mobile ticket, which is handy if you like keeping everything on your phone and not juggling paper. One practical note: this kind of walking tour is easiest when you’ve got good shoes and a phone that’s ready to shoot (charged, storage space, and a clean lens help a lot).
And if your guide is Phil, you’ll probably appreciate his practical style. One of the biggest themes from the experience feedback is that he focuses on tricks you can use right away, including how to get better results with an iPhone.
You can also read our reviews of more photography tours in Amsterdam


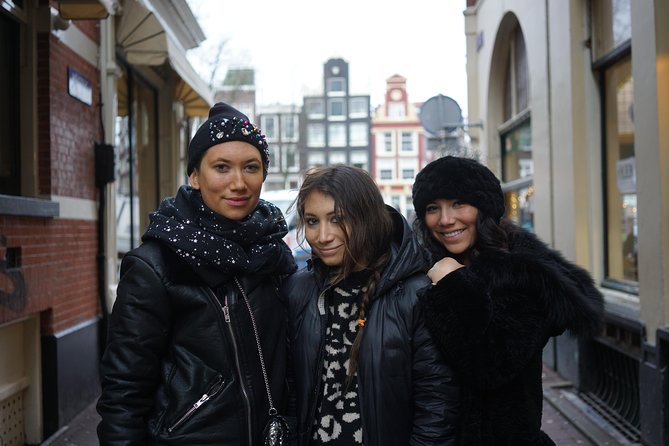
9 Little Streets (Negen Straatjes): street photos where every corner gives you choices
Your first stop is 9 Little Streets (Negen Straatjes), a pocket of Amsterdam known for photogenic streets and plenty of small visual moments. This is your warm-up, and it’s more useful than it sounds. In tight, pretty neighborhoods like this, it’s easy to get stuck doing the same shot over and over. The guide helps you break out of that.
You spend about 30 minutes here, and the big value is structure. You’re not just roaming and hoping you’ll stumble on a good photo. You learn how to see what the camera should do next. That can mean:
- choosing a steadier frame instead of aiming at everything
- looking for leading lines created by buildings and canal-side edges
- paying attention to shadows and highlights in shopfronts and alleyways
Even if you’re mostly using your phone, this stop teaches you the mindset that makes street photography work: slow down for a moment, look for the strongest visual shape, then shoot. You’ll also find it easier to photograph people-friendly scenes here without feeling like you’re interrupting anything. The streets give you lots of variety in a short time, which is great for practicing.
The only drawback is that this area is photo-friendly, so it can feel busy at times. The advantage of a guide-led session is that you can usually choose angles and timing that give you cleaner frames without turning it into a constant wait.
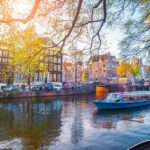
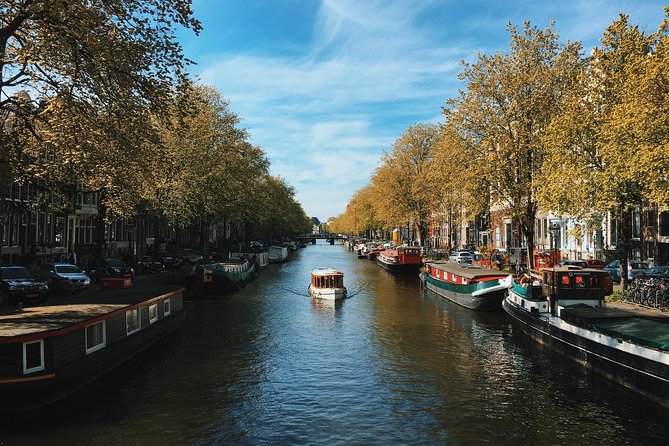
Canal Ring photography: light, symmetry, and lines that actually translate to your phone
After the street playbook, you move to the Amsterdam Canal Ring for the photo lesson people usually come for: canals. But the focus here isn’t just “take a picture of a canal.” It’s how to photograph them properly with your phone.
This is another 30 minutes, and the guide’s instruction is built around practical themes:
- light (including reflections and contrast)
- composition
- symmetry
- lines (rails, edges, building lines, and the canal itself)
Why this matters: canal photography is a trap for most visitors. It’s gorgeous, so you aim the camera and hope. The tour helps you slow the process down and choose. Reflections are only pretty if they’re composed into the frame. Symmetry only works if your angle is right. Lines only feel “designed” if you’re using them intentionally to lead the eye.
Even without fancy gear, you can make a huge difference by doing one thing repeatedly: control your framing. The canal ring gives you natural ways to frame scenes, like lining up the verticals of buildings with the horizontal strip of water, or using a bridge as a visual anchor. This is where the lessons click, because the city hands you all the geometry.
One consideration: the canal reflections and the exact look of light can change quickly. Since your session is short, you might get a slightly mixed variety of conditions. The good news is the guidance is still useful in any light, because the principles (composition, lines, symmetry) transfer immediately.
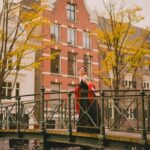
The Jordaan: capturing the quieter Amsterdam mood locals tend to notice
Next up is the Jordaan, described as the kind of Amsterdam many tourists miss. You’ll feel that right away. This stop is about mood. It’s not just another place to take a postcard. You’re learning to capture quieter scenes and the slower rhythm of residential streets.
You get about 30 minutes here, and the benefit is the contrast. If the first part teaches you structure for street scenes and the second part teaches you structured canal shots, the Jordaan teaches you how to make a photo feel calm instead of chaotic.
This is where “composition” becomes more than technical. You’ll likely focus on:
- simplifying the frame so the viewer feels the space
- using small street details that communicate neighborhood life
- finding visual patterns that don’t shout for attention
Think of it as learning how to photograph without forcing the scene to perform. That’s the difference between a generic photo and something that feels like Amsterdam, not just an image of Amsterdam.
The drawback? If you only like big, dramatic viewpoints, this might feel slower than you expect. But if you want photos with personality—streets that look lived in, not staged—that’s exactly what you’re setting yourself up for.
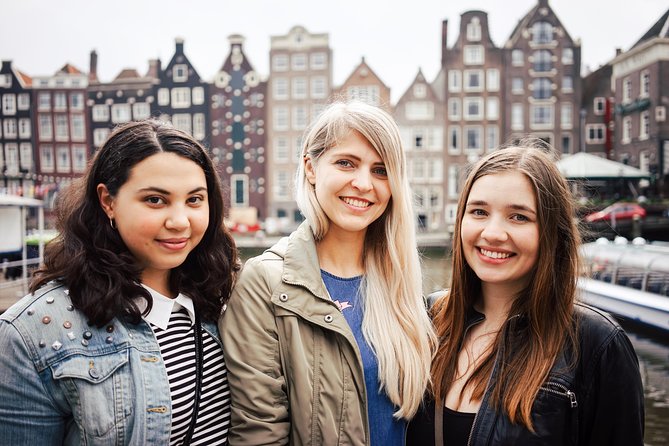
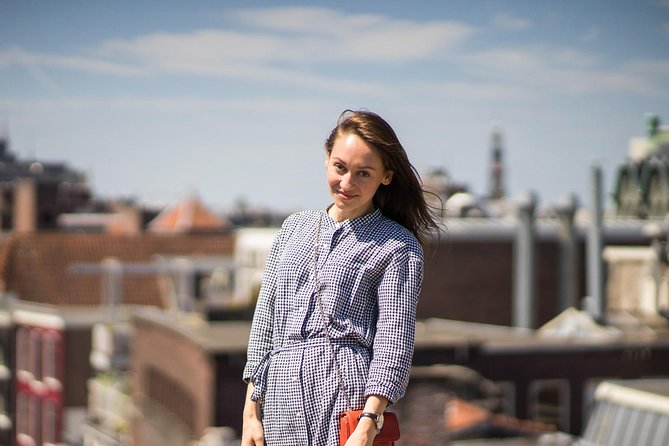
Your included professional portrait: pick the spot and choose your portrait package
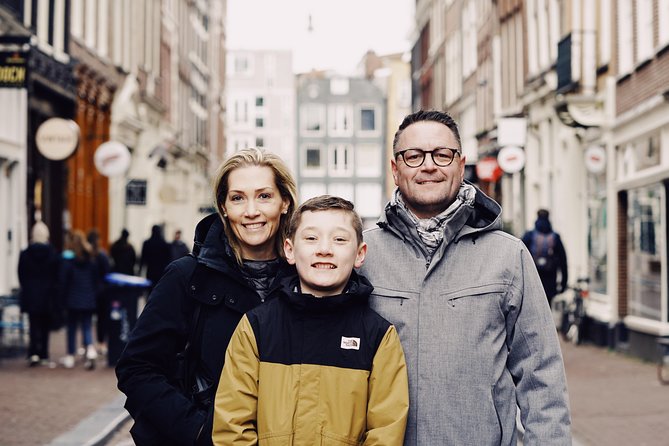
The tour doesn’t end at “walk and learn.” It includes a professional portrait session. You get to choose where your guide sends you, which is a big value-add. It means you’re not stuck taking a standard photo in whatever angle happens to be available.
Your included options are:
- Quick Shot Tour: an exclusive portrait
- Take Two Tour: 3 portraits
- Slo Mo Tour: 5 portraits
What I like about this setup is that it meets different photo goals. Some people want one great image to use for social media or prints. Others want options—different expressions, different outfits, or different looks of the same setting. The “Take Two” and “Slo Mo” packages match that.
Practical advice for making this portrait part work for you:
- decide what you want the photo to communicate (street vibe vs. soft neighborhood mood)
- wear something that feels comfortable in motion, since you’ll be walking beforehand
- keep your phone and outfit clean and simple enough that the background doesn’t overpower you
Also, if you care about phone photography, the portrait component is a bonus practice moment. Even when you’re not holding the phone in that exact shot, you’re absorbing what makes a frame flattering and intentional.


How much it costs ($66.09) and why it can be good value
At $66.09 per person, this tour is priced like an activity that tries to be both educational and outcome-based. You’re paying for:
1) a guided route through three specific photo-focused areas
2) hands-on phone photography coaching during the walks
3) a professional portrait included (with multiple package options)
A “cheap” photo walk is often just a guided stroll. This one bundles actual instruction plus a tangible deliverable at the end (your portrait). Even though you’re not buying a full day of guided sightseeing, you get focused time where you can apply what you’re learning right away—first on street textures, then on canal composition, then on neighborhood mood.
Yes, there’s no food or drinks included. That’s the kind of thing you should factor into your budget. If you’re the type who snacks between stops anyway, it’s not a big deal. If you’re trying to keep expenses low, plan for it so you’re not hungry and distracted during the portrait segment.
The other value point: it’s private. Private tours usually cost more than group experiences, so the fact that this is private while still including portrait photography is a meaningful reason to consider it.
Getting the most out of your time: quick preparation that pays off
You have a tight window, so a little prep helps a lot. Here are the things that typically make the biggest difference on a short photo session like this:
Choose your main goal before you arrive.
Do you want better phone photos for sharing? Better composition for travel memories? Or a portrait that actually feels like you belong in Amsterdam? Your guide can adjust to your goal if you’re clear.
Bring the simplest phone setup you can trust.
The tour is designed around phone photography coaching, so you don’t need expensive gear. Still, you’ll want a charged phone and enough storage for any burst shots your guide recommends.
Wear shoes you can walk in for 1.5 to 2 hours.
This is not sit-and-look sightseeing. You’re moving through three areas. Comfortable shoes keep you focused on framing instead of foot pain.
Be ready to move a little for better angles.
Amsterdam scenes are photogenic from many spots, but the best ones often require adjusting your position by a few steps. Treat it like a guided practice session.
If you want a sense of what the coaching can feel like, one feedback note highlighted that guide Phil taught new iPhone tricks. That tells you the instruction likely sticks to practical changes you can apply immediately, not theory you’ll forget in the museum line.
Should you book this Amsterdam photo tour?
I think this is a strong choice if you want two things at once: a guided Amsterdam walk and actionable phone photography help, ending with an included portrait you can use right away. It’s especially worth it if you feel like your canal photos always look flat, or if you want to capture neighborhoods like the Jordaan instead of only the busiest view-stops.
Don’t book it if you’re looking for a long sightseeing day with food included and zero walking. This is a photo-focused session. Plan your snacks, wear good shoes, and treat it like training time that results in a real photo payoff.
If that sounds like your style, you’ll probably leave with better habits and a portrait that feels like Amsterdam, not just another snapshot.
FAQ
FAQ
Where does the tour start?
The tour starts at Dam 13, 1012 JS Amsterdam, Netherlands.
How long is the tour?
It lasts about 1 hour 30 minutes to 2 hours.
Is this a private tour?
Yes. It’s private, and only your group participates.
What areas do we visit during the tour?
You’ll visit 9 Little Streets (Negen Straatjes), the Amsterdam Canal Ring, and the Jordaan.
Is admission included for the stops?
Yes. Admission tickets are listed as free for each stop.
What’s included in the price besides the walking?
A professional portrait is included, with package options: Quick Shot (exclusive portrait), Take Two (3 portraits), or Slo Mo (5 portraits).
Does the tour include food or drinks?
No. Food and drinks are not included.
What language is the tour offered in?
The tour is offered in English.
What’s the cancellation rule?
You can cancel for a full refund if you cancel at least 24 hours in advance of the experience’s start time.